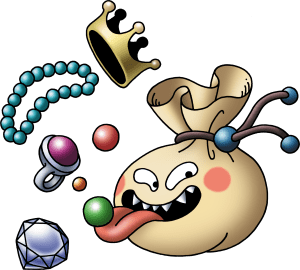
Acquiring copious amounts of loot has always been the secret, sub-game that exists within a Dragon Quest title. Sure, there’s always a big bad that needs to be slain, and in more modern titles there will likely be a few twists and turns in the story, but the truly dedicated player tends to spend their time focusing on two things; battling and crafting alchemy recipes. DQ8 remains true to form in this regard, and whilst the drop rate for items is so bad that it’ll occasionally make your eyes bleed, you’ll certainly want to indulge as much as possible. Supporting this is our goal with the article today, in which we’ll recommend some places to grind and farm up some items in the early game, though we’ll preface this entirely by saying that the early game of DQ8 is actually around 10 – 15 hours of play, and no that’s not even slightly hyperbole.
Enemy images used courtesy of the Wiki over at DRAGON-QUEST.ORG
Alexandria Region
- Fencing Fox – (Gold Bracer, Wayfarer’s Clothes)
- Skipper – (Bunny Tail, Medicinal Herb)
- Bodkin Archer – (Plain Cheese, Bandana)
Given that you’ve only really just begun to progress through DQ8, you might expect very little in terms of enemy drops to be of use at this point. For the most part this is true, however there are some enemies that you may want to take the time to defeat, even if it’s just a little more than usual. The Skipper and Bodkin Archer, both of which can be found either in the Alexandria Region or the Tower, are relatively good options for item drops, with the highlight being the fire-aoe inducing Plain Cheese.
The main event however is the Fencing Fox, because this swift purple lad can drop the Gold Bracer. Alone this item will increase your defence by +4, however its real benefit is revealed when you use it as an Alchemy ingredient, where it can be combined with a Recovery Ring into a Life Bracer, which is one of the best defensive accessories in the game. By extension, it’s even a crucial element in making one of the best swords in the game, the Uber Miracle Sword. We’re not saying that you should plan this far in advance, far from it, but taking the time to defeat some of these purple foxes could have more benefits than simply gold and experience.
Peregrin Quay & Maella Region
- Dingaling – (Gold Bracer, Hairband)
- Lump Mage – (Wizard’s Staff, Cypress Stick)
- Hell Hornet – (Poison Moth Knife, Moonwort Bulb)
The first thing that you’ll note about our next location, which is approximately between Peregrin Quay and near Maella Abbey, is that we’re again referencing the Gold Bracer, this time dropping from the Dingaling enemy. They might be relatively easy to get when you’ve progressed through the game by a significant amount, but managing to get your hands on a few at this point will unlock some powerful accessories at the earliest possible point.
Outside of this there are a few further options. Taking on the Lump Mage, which you’ll tend to find deep into the fields prior to the Abbey, can be worthwhile. The Wizard’s Staff is a great choice here, and whilst you’re going to be able to purchase one from a town nearby, they do cost 1300g, which is pretty expensive at this point. The real main event however, is grabbing yourself a Poison Moth Knife from the Hell Hornet enemy. These cannot be purchased for quite a while, come with a +29 attack bonus and even have a 1 in 8 chance to paralyze your target. We’re not necessarily advocating an investment into Knives from a skill perspective, but using something like this in the early game is quite beneficial.
Advertisement
Pickham & Swordsman’s Labyrinth
- Minidemon – (Wing of Bat, Rockbomb Shard)
- Goodybag – (Prayer Ring, Gold Bracer)
- Mummy – (Scholar’s Specs, Turban)
Remember when we noted that a Wizard’s Staff is quite important? Well, this is the reason why. If you manage to grab yourself a Rockbomb Shard, which the Minidemon in the Pickham region can drop, you can combine them in the Alchemy pot to create the Magma Staff. This weapon can be used as an item in battle to cast the ‘Bang’ spell for free, which is still pretty damned powerful at this point in the game, especially since it targets all enemies and not just a group. You will need two Rockbomb Shards to complete the recipe, but it’s certainly worth it, and it’ll make the upcoming Swordsman’s Labyrinth an absolute breeze.
Speaking of said Labyrinth, you’re going to want to spend some time taking down opponents in there, because it plays host to what is probably our favourite early game grinding monsters, the Goodybag. Not only do these opponents drop quite a significant sum of gold when defeated, but they can also drop the incredible Prayer Ring. This accessory gives +5 Defence and restores 20 – 30 MP when it’s used as an item in battle, which is a great way to sustain any heavy spell caster or healer. Not only are these unavailable for purchase until much later in the game, but they’re also a key component in countless Alchemy recipes, and using them along with any ‘Seed’ item will transform them into different rings, like a Strength Seed transforming it into a Strength Ring for increased physical damage.
Finally, if you’re feeling especially patient and want to power up your spells as much as you can, it’s possible for the Mummy enemy to drop the Scholar’s Specs, which increase your Wisdom stat by a whopping +15 points. This is a massive boost at this point in the game, to the point where you’re unlikely to find anything better until the very end game in pure damage terms. Just don’t blame us if you waste what feels like a million hours getting them to drop.
Trodain Castle & Region
- Rockbomb – (Rockbomb Shard, Rock Salt)
- Dieablo – (Gold Ring, Gold Bracer)
- Liquid Metal Slime – (Seed of Agility, Elevating Shoes)
- Wailin’ Weed – (Coral Hairpin, Red Mould)
We should first note that yes, you’ve probably taken up to around 15 – 20 hours to get to this point in the game, depending on the amount that you’ve stopped to grind and create, however this is still technically the early game of Dragon Quest 8. You’ve yet to unlock the first mode of transport, and there are whole other continents that require exploration, so don’t go mistaking this for any kind of ‘mid’ point in the story.
You’ll first note that we’ve opted for another repeat; the Rockbombs in the desert prior to the Trodain area are another source of the Rockbomb Shard, meaning this is another opportunity to combine two of them to access the Magma Staff, which will cast the ‘Bang’ spell for free when used as an item. It’ll feel less impactful at this point, but it’s still nice to have a spell that targets all enemies and is available for free every round.
Outside of this, the main loot that you’ll want to aim for is the Coral Hairpin, which is rarely dropped by the Wailin’ Weed enemy. Alone this will increase the defence of Jessica (and Red, later) by a huge +20, but it can also be used to create even better items, including the Dogsbody outfit for Yangus. These cannot be purchased until you reach a town on another continent, so grabbing one now will be useful. Plus, any Red Mould you grab at the same time can be used to create Spicy Cheese, which effectively gives the hero a slightly more powerful Bang spell in battle.
Finally, if you’ve taken some of the critical strike Metal Slime killing skills, you really should stop off in the castle to take down a Liquid Metal Slime or two. They give massive amounts of experience, and if all of the stars align and you get an item drop from them, either a Seed of Agility or the Elevating Shoes is a great find. The former can be combined with an earlier drop we noted, the Prayer Ring, to create a version that increases Agility, and the latter can be squished together with a Feathered Cap to create a Happy Hat, which restores MP as either Jessica or Angelo walk around!

Categories: Dragon Quest VIII


