

Found in the desert of Stardew Valley, Skull Caverns is a randomly generated dungeon. It’s essentially a later game place in which you can find challenging enemies, randomly generated floors and oodles of epic loot. Not only is it a fantastic challenge to take on, but it’s also the best way to get yourself Iridium Ore, at least early on. This ore is needed to upgrade all of your farm equipment to it’s highest level, so it’s something certainly worth going for! This place is not for the faint of heart however, especially given the lack of an elevator, and it’ll reset itself every time you leave, so you’d best get yourself prepared!
How To Unlock Skull Caverns

To unlock Skull Caverns, two different tasks must be completed:
- Firstly, you must get yourself to level 120 of the regular mines, found in the mountains north of your farm. Once you get there you’ll find the Skull Key in a chest, which is required to unlock the door to Skull Caverns.
- Secondly, you’ll need to complete the Vault Bundles to unlock, which costs a total of 42,500g. This will unlock the bus repair, which allows you to travel to the Calico Desert, the location of Skull Caverns. This can also be completed in the Joja route by purchasing the bus option from the Joja Community Development Form, which costs 40,000g.
Once you have completed these two things, you’re ready to get to the Skull Caverns… Or are you? This place is filled with great loot sure, but it’s also filled with dangerous and unusual enemies, so you’d do well to ensure that you’re well prepared before heading out.
Advertisement
The Best Tools for Skull Caverns
Really, the only tool you actually need for Skull Caverns is your Pickaxe, but descending into it’s depths with this alone is a recipe for disaster. Still it is essential down there, so make sure you bring one that’s upgraded as much as possible. An Iridium Pickaxe would be ideal, but you’re probably coming here to get some of that, so a Gold one will also do, though you’ll take a bit longer to smash rocks.
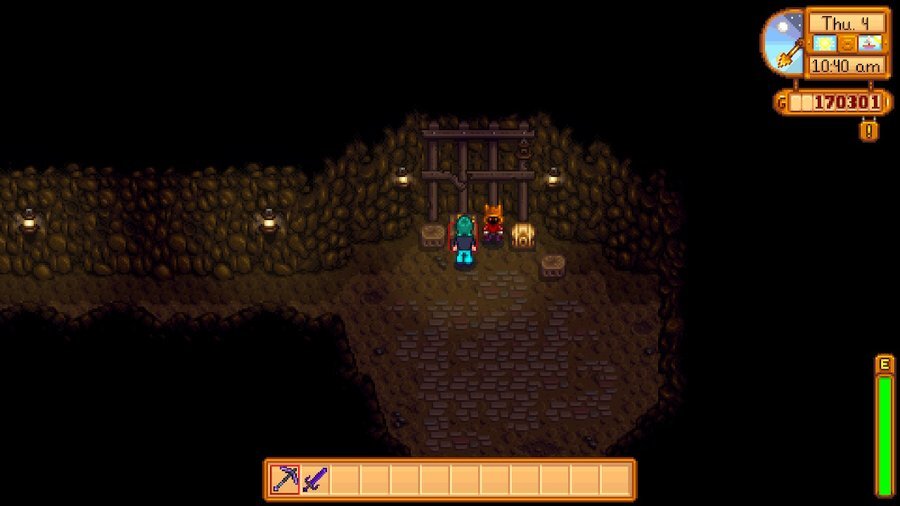
Just as essential as the Pickaxe are bombs. These can be used to break open rocks in a quick and efficient way, allowing you to quickly collect ores and more importantly, locate the stairs and chutes down. The lower you go the more chance you’ll have of finding Iridium, so bombs are a great way to speed up this descent. You can either craft yourself a load of these bombs, or buy them from the Dwarf Merchant in the mines, pictured above. Following are the different types you can get your hands on:
Cherry Bombs
- Explosion Type: Small
- Crafting Recipe: 4 x Copper Ore, 1 x Coal
- Purchase Price: 300g
Bombs
- Explosion Type: Medium
- Crafting Recipe: 4 x Iron Ore, 1 x Coal
- Purchase Price: 600g
Mega Bombs
- Explosion Type: Large
- Crafting Recipe: 4 x Gold Ore, 1 x Solar Essence, 1 x Void Essence
- Purchase Price: 1000g
Generally we recommend you take the regular Bombs with you. They’re easy to craft, especially if you’ve been through the regular mine recently and gotten a haul of Iron Ore. Of course, if you’ve gotten yourself a load of Artisan goods from a well managed farm, you can just buy your way to victory. Still, doing so only prepares you for the environment, what about the local wildlife…?
The Best Weapons for Skull Caverns

Your weapon of choice in Stardew Valley tends to be a personal preference. Some players love the slamming form of a big hammer, others the short stabby efforts of a dagger. Some crazy lot even try to go through the entire game with slingshot alone. Either way, to take on the depths of Skull Caverns you’re going to need some firepower, so we’d recommend you consider the following options:
Dark Sword
- Drops from the Haunted Skull in either the Mines or the Quarry Mine.
Our first choice is certainly not a powerful one, but rather something that we consider the ‘bare minimum’ for Skull Caverns exploration, despite it being very slow compared to other weapons. The Dark Sword isn’t tremendously powerful, certainly when compared to other in this list, but it has one redeeming feature: It has an 8% chance to heal you for half of the damage done, and this applies to every enemy you hit with your swipe. Great against hordes of enemies then.
Lava Katana
- Purchase from the Adventurers Guild for 25,000g
Pictured above, you can get your hands on the Lava Katana at the Adventurers Guild. This is powerful enough to get you through the Skull Caverns. There are much more powerful option available of course, but most of them require rare crafting materials that you may not have found yet.
The Slammer
- Rare chance to drop from a crate or special enemy
If you’ve managed to get your hands on The Slammer prior to going to Skull Caverns, you can consider yourself lucky. It’s a Club type weapon and even then it’s not tremendously powerful, but it’ll do the job for you if you’re unable to get your hands on anything else yet.
Galaxy Sword
- Take a Prismatic Shard and stand between the three pillars in the Calico Desert
Speaking of luck, if you’ve managed to get your hands on a Prismatic Shard prior to taking on Skull Caverns, you can get yourself a Galaxy Sword. This is the ideal weapon for taking on the Skull Caverns, with it’s high damage and quick swing speed. Once you’ve unlocked this sword, the Adventurers Guild will sell you alterative Galaxy weapons, but be prepared to spend big for them!
Advertisement
The Best Accessories for Skull Caverns
So you’ve grabbed yourself some tools and a good weapon, but what about those other equipment slots? You can equip one set of boots, which mainly provide defensive statistics, and two rings which themselves provide a variety of novel buffs. Logically you’ll want the best boots possible and a selection of beneficial rings, but this being your first trip into Skull Caverns your choices might be limited. We’ve picked out a few of each that we’ve found provide the most benefit, and that you’re likely to have prior to this point.
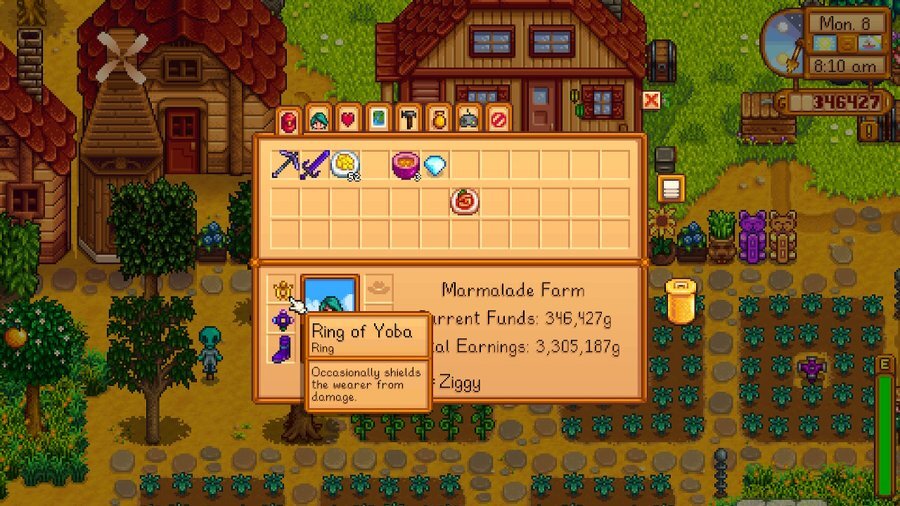
Ring of Yoba
- Craft with 5 x Gold Bar, 5 x Iron Bar and 1 x Diamond (Requires Combat Level 7)
The Ring of Yoba is a great starting point that you can achieve prior to taking on Skull Cavern. As you can see above, this ring occasionally shields you from taking damage. This does not completely ignore damage, however it might save your life down there. If you happen to have higher luck than usual, or be low on health, it’ll have more chance to activate.
Vampire Ring
- Reward at the Adventurers Guild for slaying 200 Bats
It might sound like a lot, but Bats are everywhere, so completing this objective prior to your jaunt in the Skull Caverns isn’t too bad. Should you do so, you’ll get your hands on a ring that restores 2 HP every time you slay an enemy. Combine this with your Ring of Yoba and you have a nice duo of defensive equips!
Space Boots
- Reward in a chest at level 110 of The Mines
Having traversed down The Mines to get your Skull Key, you’ll have managed to get your hands on these boots. They provide +4 to both Defence and Immunity, which is a great starting point for taking on the Skull Caverns.
Firewalker Boots
- Found in a chest at level 80 of The Mines
Much like the space boots above, the Firewalker Boots are obtained whilst you traverse The Mines. These only provide +3 to both Defence and Immunity, which aren’t quite as good but they’ll still do the job. Having gotten the Skull Key you should have the Space Boots but hey, you might just prefer Orange?
The Best Food for Skull Caverns

Equipment taken care of, now its time for those consumables. Food is an essential item needed to replenish health and energy, both of which will be in short supply in Skull Caverns. Additionally, meals will provide buffs, some of which can make a real difference, though its worth noting that you’ll want to bring some normal food – Omelettes, Cheese or such – to avoid overwriting your buffs every time you need to heal or replenish energy. Anyway, the following are some of the foodstuffs that we recommend you bring along on your journey:
Pumpkin Soup
- Recipe: 1 x Pumpkin and 1 x Milk.
- Learned: Reach 7 hearts with Robin to receive the recipe.
- Restores: 200 Energy and 80 Health.
- Buff: + 2 Defence, +2 Luck.
Triple Shot Espresso
- Recipe: 3 x Coffee.
- Learned: Buy the recipe from the Stardrop Saloon for 5,000g.
- Restores: 8 Energy and 3 Health.
- Buff: +1 Movement Speed. This stacks with other food buffs.
Spicy Eel
- Recipe: 1 x Eel, 1 x Hot Pepper.
- Learned: Reach 7 hearts with George to learn the recipe, also dropped by monsters in Skull Caverns.
- Restores: 115 Energy and 51 Health.
- Buff: +1 Luck, +1 Movement Speed.
Eggplant Parmesan
- Recipe: 1 x Eggplant, 1 x Tomato.
- Learned: Reach 7 hearts with Lewis to receive the recipe.
- Restores: 175 Energy, 78 Health.
- Buff: +1 Mining, +3 Defence.
Advertisement
Skull Caverns Tips & Tricks
- Bring at least one stack of Stone! You can use 100 of these to craft a set of stairs, getting you down to the next level of the dungeon quickly!
- Carls Guides has a great section on the enemies you’ll face, check it out HERE!
- Don’t take anything you cannot afford to lose! You’ll lose some items along with 1,000g if you die in Skull Caverns, so be careful!
- Beware of big purple smiles, they turn into multiple little slimes!
- Try to go into the mines on a Lucky day! You can check the fortune teller on the TV to find out how lucky the day is. This will affect drops, ladders and all sorts down in the caverns!
- Consider taking the mining skill that gives you the extra ore perk!
- If you pass out at 2AM you’ll wake up with all of your loot and only lose 1,000g!

More Stardew Valley…

Achieving Perfection #4 – Crafting | Stardew Valley
The next step that we’re taking, and indeed documenting, towards perfection is that of crafting. As a whole this will cover a great deal of elements within Stardew Valley, because crafting in some way tends to be involved with pretty much everything that you do, and whilst you’ll certainly tackle the subject regularly in a…
Achieving Perfection #3 – Cooking | Stardew Valley
Our third step in Stardew Valley perfection is to target Cooking, for which you will require a great deal of recipes to complete to 100%. Now, you will likely do a great deal of cooking regardless of your play style, because the foods are tremendously useful for restoring health and energy whilst you’re adventuring, but…
Achieving Perfection #2 – Friendships | Stardew Valley
On your journey towards perfection in Stardew Valley, you’ll soon encounter the tricky subject that is friendship, and indeed the maximising of said relationships with every applicable resident. We call this tricky, because it relies more upon knowledge than it does time, though admittedly achieving perfection in this regard is still going to be very…
Something went wrong. Please refresh the page and/or try again.
Categories: Stardew Valley
Be nice if had mod to stop from dieing mines needing sleep at 2 am
Completely agreed, but remember opening your bag does freeze time from moving, and it helps to leave yourself a chest in the Desert zone with some supplies that you might need!