
Learning to use the Bow effectively is one of the great joys in a Monster Hunter title. Peeling away at it’s metaphorical layers gradually reveals an agile, adaptable and above all powerful weapon, that’s fully capable of defeating any and every challenge the series can throw at you. You could of course argue that this is the case with each of the 14 available in Rise, and to a certain extent we would agree, but there are few that can do so much in such relative safety as the Bow can. A result of it’s nuance and myriad benefits however, is that it can become difficult to know exactly which model you should use, especially when they have to consider Arc Shots, Coatings and Charge Shot levels. Fear not intrepid hunter, for we have returneth to the crease once more, this time to recommend three early Bows that shall set you right upon the path of arrowdom.

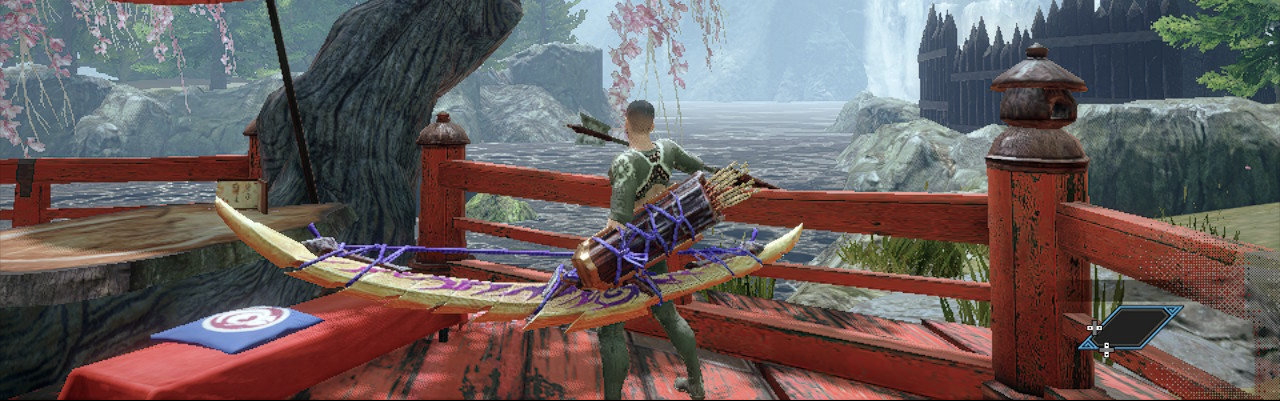
Dawn Ray Bow
As noted, the Bow is a weapon that can adapt itself to numerous situations, and it is very powerful when used in a solo environment, however using it alongside teammates is undeniably one of the most fun experiences in Monster Hunter. That said, our first choice is one that leans in that very direction: The Dawn Ray Bow, otherwise known as the Bishaten model. Those familiar with the monster in question are unlikely to be surprised by it’s ‘different’ nature, after all we just recommended a Switch Axe from the very same target that applied Dragon type damage, but here our reasons for doing so are exclusive to the Bow; Coatings, and more specifically those that are extra effective, signified by a yellow plus sign on the coating.
Not only does this Bow feature the usual Power Coating, which is the ‘go to’ for increasing damage done, but it also features highly effective versions of both Poison and Para Coating. This means that the Dawn Ray Bow in particular is very proficient at applying both Poison and Paralysis. The former of course, is always a nice touch of additional damage, however it’s the latter that we’re really looking at here, after all having the ability to paralyze a target will ensure that no matter how much you flail around whilst learning this complex and tricky weapon, you’re still bringing value to the hunt. We’ve played Monster Hunter games for over 10 years, and we can firmly state that having a Bow user that applies debilitating status effects is one of the best things to bring to a hunting team. Oh, and this particular model also has nice raw damage, the Affinity Arc Shot and focuses on Rapid type Charge Shot, which is a great first type to practice with!
Early Features
- Good raw damage.
- Features mainly Rapid type Charge Shots, which fire multiple arrows at once.
- Has the Affinity Arc Shot, which is one of the most useful types.
- Extra effective Poison and Para Coating.
- Great ‘status’ Bow to take with you onto Multiplayer hunts.
Crafting Requirements
- Bishaten Feather x 4
- Bisha Tailcase x 1
- Bishaten Fur x 2
- Dragonite Ore x 4
This recipe really isn’t that bad. You’ll get a fair amount of Feathers when carving and defeating a Bishaten, so these shouldn’t take you more than a few hunts to gather, and the Fur can generally be found alongside them. The Dragonite Ore can be found by mining in zones that you’ve just unlocked, so the only real issue would be the Tailcase, but even this has a 100% drop rate when you break the tail!
Advertisement

Queen Blaster
Once again the series’ infamous difficulty wall, Rathian, returns to our pages. We’ve noted previously that there is no coincidence that some great, albeit occasionally niche equipment is garnered from both Rathian and Rathalos, because these often act like difficulty spikes in the series, so offering good rewards incentivises their defeat. The same is true in Rise, because despite the red sibling’s armour set being somewhat nullified, there’s still some good loot to be had, including the Rathian-based Bow known as the Queen Blaster.
We should initially indicate that this Bow in particular is lacking in a Power Coating, so you’re not necessarily going to get a flat damage increase, however it does have access to an extra effective Poison Coating. This isn’t too unusual of course, especially given that our prior recommendation has the same, however it’s worth noting that the third level of Charge Shot on this Bow is Spread type. This means that it will fire out a cone of arrows, making it possible to pepper the target with multiple at a time from a closer distance. This is our main reason for recommending this, because not only does it do Fire damage along with it’s Poison Coating, but it’ll also expose you to the different, closer range style that the Bow has available to it. Plus, there are quite a few fire-weak opponents that you’ll face on the way into High Rank, so it’ll fare well in upcoming hunts.
Early Features
- Good raw damage.
- Opts for Spread type Charge Shot at level 3, which when used in combination with the Fire element on this bow, will cause tremendous damage to opponents weak to this element.
- Access to extra effective Poison status coating.
- Also comes with the Affinity Arc Shot.
- Great for solo play and fantastic for taking on upcoming monsters.
Crafting Requirements
- Rathian Shell x 2
- Rathian Webbing x 2
- Dragonite Ore x 2
This is possibly one of the smallest shopping lists we’ve ever had for a recommendation. You’ll get bucket loads of the Shells by simply hunting a Rathian, and you’ll likely get a slightly smaller bucket of Webbings too, though breaking its wings can help to speed this up a little. For those looking for Dragonite Ore we’ll give you a clue: Mine it in the most orange of maps. You know, the one with the lava and the caverns, what was its name again..?
Advertisement
Sinister Bow
Speaking of bows that enjoy being at close range, next up we have the Sinister Bow. No doubt you’re aware that we often recommend the Magnamalo series of weapons, and rightly so since they’re all pretty powerful, we must say that the bow in particular is one of, if not the best of the bunch. Yes, you will have to return once again to the phial that is one purple exploding doggo, but it’s wholly worthwhile for a bow such as this. If by chance you are getting a little fed up of seeing it as a target, it’s worth considering taking on some Event Quest multiplayer hunts; generally speaking these offer better loot at the cost of increased difficulty, but with a reasonable group you should be able to take it down.
Much like our previous choice, this particular bow trends towards close range combat. Alright, so it doesn’t so much trend but rather lean entirely into it, but in the process allows you to deal frankly disgusting amounts of damage. It achieves this by offering extra effective Close-range coating, Spread shots at level 2 and 3 of charge and by boosting these further through good raw damage, Blast element being attached to each shot and even offering Attack Boost II as a Rampage Skill! What results is a bow that is hyper focused on dealing big damage from a short range, and the tangible result of this is that your screen will frequently be filled with big, chunky orange damage numbers. Yes, it’s likely to take a bit more skill to live in close quarters to a target, but when the benefits are this good, it’s wholly worthwhile.
Early Features
- Good raw damage.
- Primarily focuses on Spread type Charged Shot. This, combined with it’s extra effective Close-range Coating means you’ll be able to deal huge amounts of damage when you position yourself near the target.
- Features the Attack Boost II Rampage Skill.
- Blast Coating, along with it’s natural Blast element, can add up to deal even more damage.
- The Arc Shot, Brace, is rather poor compared to the others.
- The fully upgraded, late game version reaches Rapid 5 Charge Shot, which deals tremendous damage.
Crafting Requirements
- Magnamalo Blade x 2
- Magnamalo Scute x 2
- Magnamalo Scale x 4
- Magna Ghostprism x 1
It might look like quite a few parts here, but things really aren’t too bad. The Blades do require that the Armblade be broken, which is a soft spot of Magnamalo anyway, and the Scute is a little more awkward due to requiring the back be broken, however capturing the beast can also increase your chance at this. Both the Scales and Ghostprisms will drop in plentiful amounts throughout hunts versus the beast, though if you’re struggling with the latter we would recommend Wyvern Riding as a method to get them to drop.

More Monster Hunter Rise…
Should Siege Hunts Return In Sunbreak? | Monster Hunter Rise
A long time staple of the series, siege hunts see one or more hunters take on mammoth opponents, often ludicrous in size and shape, whilst occupying massive, multi-tiered arenas. These have seemingly been usurped in Monster Hunter Rise, where they have instead opted for Rampages, and whilst these function in a somewhat similar fashion, they…
Our Sunbreak Monster Wishlist | Monster Hunter Rise
The sun will soon rise on the expansion for Monster Hunter Rise, Sunbreak. Having lived through far too many expansions and ultimate versions of games in this series, we’re all too aware of what these entail; greater challenges, new tiers of equipment and most importantly, more monsters. It’s this latter point in particular that interests…
Difficult Low Rank Monsters & How To Defeat Them | Monster Hunter Rise
Pushing your way through Low Rank can be tremendously difficult for those new to the Monster Hunter series. All of your friends are likely off fighting the latest version of a cataclysm approaching a small village, and yet here you are still struggling to get off the ground against base level opponents. Worse still, your…
Something went wrong. Please refresh the page and/or try again.
Categories: Monster Hunter Rise, Top 5